
## How to Paint Crashing Waves in Acrylics: A Comprehensive Guide
Have you ever been captivated by the raw power and beauty of crashing waves and wished you could capture that energy on canvas? Learning how to paint crashing waves in acrylics can seem daunting, but with the right techniques and a bit of practice, you can create stunning seascapes that evoke the feeling of the ocean’s untamed spirit. This comprehensive guide will take you from understanding the fundamentals to mastering advanced techniques, ensuring you can confidently paint realistic and dynamic crashing waves. We’ll explore everything from choosing the right materials to layering colors and creating the illusion of movement, providing you with the knowledge and skills to bring your vision to life. Many resources only scratch the surface, but our in-depth approach, refined through years of experience, will provide a level of detail and clarity unmatched by typical tutorials. We’ll also address common pitfalls and offer practical tips to overcome them, ensuring your journey into painting crashing waves is both rewarding and successful.
### Why Paint Crashing Waves?
Painting crashing waves isn’t just about replicating a scene; it’s about capturing the essence of the ocean’s power and beauty. The movement, the light, the textures – all these elements combine to create a dynamic and visually stunning subject. Acrylics are the perfect medium for this, offering vibrant colors, quick drying times, and versatility in application. Whether you’re a beginner or an experienced painter, learning to paint crashing waves will enhance your skills and allow you to express your creativity in new and exciting ways.
## 1. Understanding the Anatomy of a Crashing Wave
Before you even pick up a brush, it’s crucial to understand the anatomy of a crashing wave. This knowledge will inform your painting decisions and help you create a more realistic and believable depiction. Let’s break down the key components:
* **The Base:** This is the body of water from which the wave rises. It’s usually darker in color and provides the foundation for the entire composition.
* **The Swell:** The swell is the smooth, rounded part of the wave before it begins to break. It’s characterized by its gentle curves and subtle color variations.
* **The Crest:** This is the highest point of the wave, where it begins to curl and break. It’s often the lightest part of the wave, catching the sunlight and creating highlights.
* **The Lip:** The lip is the edge of the crest that curls over and crashes down. It’s a dynamic and visually exciting element, often depicted with foam and spray.
* **The Foam:** As the wave crashes, it creates foam – a mixture of air and water. Foam adds texture and visual interest to the painting, and it can be depicted with various techniques.
* **The Spray:** The spray is the mist of water that shoots up into the air as the wave crashes. It adds a sense of movement and energy to the scene.
Understanding these components will help you break down the complex form of a crashing wave into manageable parts, making it easier to paint.
### 1.1. Essential Materials for Painting Crashing Waves in Acrylics
Choosing the right materials is essential for achieving the desired results. Here’s a list of the key supplies you’ll need:
* **Acrylic Paints:** High-quality acrylic paints are a must. Look for a range of blues, greens, whites, and grays. Titanium White, Ultramarine Blue, Cerulean Blue, Phthalo Blue, and Payne’s Gray are excellent choices. Consider adding a touch of yellow ochre or burnt umber for warmth and depth.
* **Brushes:** A variety of brushes is crucial. You’ll need large flat brushes for blocking in the base and swell, round brushes for details and foam, and a fan brush for creating spray effects. Stiff-bristled brushes are ideal for creating texture.
* **Canvas or Painting Surface:** Choose a canvas or painting panel that is primed and ready to use. The size of the canvas will depend on the scale of your painting.
* **Palette:** A palette for mixing your paints. A disposable palette or a wet palette (to keep your acrylics moist) are good options.
* **Palette Knife:** A palette knife is useful for mixing paints and creating textured effects.
* **Water Container:** A container of clean water for cleaning your brushes.
* **Rags or Paper Towels:** For wiping your brushes and cleaning up spills.
* **Mediums (Optional):** Acrylic mediums can be used to alter the properties of your paints, such as their drying time or viscosity. Gel mediums are particularly useful for creating texture.
### 1.2. Setting Up Your Workspace
Creating a comfortable and organized workspace is essential for a smooth painting process. Ensure you have good lighting, a stable easel or surface for your canvas, and all your materials within easy reach. Protect your work surface with a drop cloth or newspaper.
## 2. Blocking in the Base and Sky
The first step in painting crashing waves is to block in the base and sky. This establishes the overall composition and provides a foundation for the rest of the painting.
* **Sky:** Start by painting the sky. Use a large flat brush to apply a thin layer of blue paint, blending it gradually from a darker shade at the top to a lighter shade near the horizon. Add a touch of white to create clouds or atmospheric effects.
* **Base:** Next, paint the base of the wave. Use a darker shade of blue or green to represent the deep water. Add a touch of black or brown to create shadows and depth. Use horizontal brushstrokes to suggest the movement of the water.
### 2.1. Color Mixing Techniques for the Ocean
Achieving realistic ocean colors requires careful color mixing. Here are some tips:
* **Blues:** Mix different shades of blue to create depth and variation. Use Ultramarine Blue for deeper, darker blues, and Cerulean Blue for lighter, brighter blues. Add a touch of white to create lighter shades.
* **Greens:** Mix blue and yellow to create greens. Use Phthalo Blue and a touch of yellow ochre for a deep, vibrant green. Add white to create lighter shades.
* **Grays:** Mix blue, black, and white to create grays. Use Payne’s Gray for a subtle, atmospheric gray.
* **Warm Accents:** Add touches of yellow ochre or burnt umber to create warmth and depth in the water.
### 2.2. Layering Techniques for Depth
Layering is a crucial technique for creating depth and dimension in your painting. Apply thin layers of paint, allowing each layer to dry before applying the next. This allows you to build up the colors and values gradually, creating a more realistic and nuanced effect. Start with darker shades and gradually add lighter shades to create highlights and shadows.
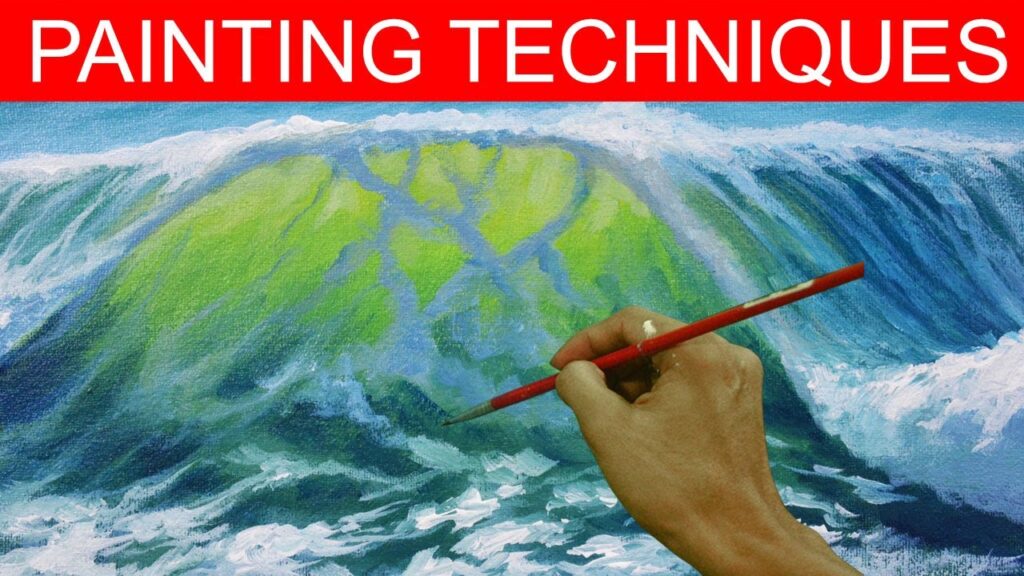
## 3. Painting the Swell and Crest
Once the base and sky are blocked in, it’s time to focus on the swell and crest of the wave. This is where the painting really comes to life.
* **Swell:** Use a large round brush to paint the swell. Use lighter shades of blue and green to represent the sunlight reflecting off the water. Blend the colors smoothly to create a sense of movement and flow.
* **Crest:** Use a smaller round brush to paint the crest of the wave. Use the lightest shades of blue and white to represent the foam and spray. Add texture by stippling the paint or using a palette knife.
### 3.1. Creating the Illusion of Movement
To create the illusion of movement, use dynamic brushstrokes and blend the colors smoothly. Suggest the flow of the water by using curved brushstrokes that follow the shape of the wave. Use short, choppy brushstrokes to create texture and suggest the breaking of the wave.
### 3.2. Capturing Light and Shadow on the Water
Light and shadow are essential for creating a realistic depiction of water. Observe how light interacts with the water in real life and try to replicate those effects in your painting. Use lighter shades to represent highlights and darker shades to represent shadows. Pay attention to the direction of the light source and how it affects the appearance of the water.
## 4. Adding Foam and Spray
Foam and spray are crucial elements for creating a dynamic and visually exciting crashing wave. They add texture, movement, and a sense of energy to the scene.
* **Foam:** Use a small round brush or a palette knife to apply the foam. Use thick, textured strokes to create the impression of bubbles and froth. Vary the colors of the foam, using shades of white, gray, and blue.
* **Spray:** Use a fan brush or a dry brush to create the spray. Load the brush with white paint and flick it across the canvas to create a mist of water droplets. Vary the density and direction of the spray to create a sense of movement.
### 4.1. Techniques for Painting Realistic Foam
Creating realistic foam requires careful attention to detail and a variety of techniques. Here are some tips:
* **Stippling:** Use a small round brush to stipple the paint onto the canvas, creating a textured effect.
* **Dry Brushing:** Use a dry brush to create a rough, textured effect. Load the brush with a small amount of paint and drag it across the canvas.
* **Palette Knife:** Use a palette knife to apply thick, textured strokes of paint.
* **Layering:** Layer different shades of white, gray, and blue to create depth and variation in the foam.
### 4.2. Achieving Dynamic Spray Effects
Creating dynamic spray effects requires a light touch and a bit of practice. Here are some tips:
* **Fan Brush:** Use a fan brush to create a wide, dispersed spray.
* **Dry Brush:** Use a dry brush to create a more controlled and directional spray.
* **Flicking:** Load the brush with paint and flick it across the canvas to create a mist of water droplets.
* **Masking:** Use masking tape or stencils to create specific shapes and patterns in the spray.
## 5. Refining and Adding Details
Once you’ve blocked in the main elements of the painting, it’s time to refine the details and add the finishing touches. This is where you can really bring your painting to life.
* **Highlights:** Add highlights to the crest, foam, and spray to create a sense of light and sparkle.
* **Shadows:** Add shadows to the base and swell to create depth and dimension.
* **Details:** Add small details, such as individual droplets of water or subtle color variations, to enhance the realism of the painting.
### 5.1. Final Touches for a Polished Look
Before you call your painting finished, take a step back and assess the overall composition. Look for areas that need further refinement or adjustment. Add any final touches that will enhance the overall look and feel of the painting.
### 5.2. Common Mistakes and How to Avoid Them
Even experienced painters make mistakes. Here are some common pitfalls to avoid when painting crashing waves:
* **Overworking the Painting:** Avoid overworking the painting. Too much detail can make the painting look stiff and unnatural.
* **Ignoring the Anatomy of the Wave:** Pay attention to the anatomy of the wave. Understanding the different components will help you create a more realistic depiction.
* **Using Too Much Detail:** Don’t get bogged down in the details. Focus on capturing the overall essence of the wave.
* **Incorrect Color Mixing:** Ensure that the colors are consistent with the color palette. Incorrect colors can make the painting look unnatural.
* **Lack of Contrast:** Lack of contrast can make the painting look flat and lifeless.
## 6. Product Explanation: Golden Heavy Body Acrylics
When it comes to painting crashing waves with acrylics, the quality of your materials significantly impacts the final result. Golden Heavy Body Acrylics stand out as an exceptional choice for artists aiming to capture the dynamic textures and vibrant colors of the ocean. These professional-grade acrylics are renowned for their high pigment concentration, exceptional lightfastness, and buttery consistency. Their versatility allows artists to achieve a wide range of effects, from smooth gradients to bold impasto textures, making them ideal for portraying the complexities of crashing waves.
## 7. Detailed Features Analysis of Golden Heavy Body Acrylics
Golden Heavy Body Acrylics offer several key features that make them a preferred choice for artists painting crashing waves:
1. **High Pigment Load:** What it is: These acrylics contain a very high concentration of pigment, resulting in intense, vibrant colors that retain their brilliance over time. How it works: The high pigment load ensures that even when mixed with mediums, the colors remain rich and true. User Benefit: Artists can achieve deep, saturated colors and subtle gradations, crucial for capturing the nuances of light and shadow on water. This demonstrates quality by ensuring long-lasting and vibrant artwork.
2. **Exceptional Lightfastness:** What it is: Lightfastness refers to a paint’s ability to resist fading or discoloration when exposed to light. How it works: Golden Heavy Body Acrylics are formulated with pigments that are highly resistant to UV degradation. User Benefit: Paintings created with these acrylics will maintain their original colors for decades, ensuring the longevity of the artwork. This showcases expertise in pigment selection and formulation.
3. **Buttery Consistency:** What it is: The paints have a thick, smooth, and buttery consistency that allows for easy blending and application. How it works: The consistency is achieved through a careful balance of pigments and acrylic polymers. User Benefit: Artists can create smooth transitions, build up textures, and achieve a variety of brushstrokes with ease. This highlights the quality of the binder and its impact on handling.
4. **Versatility:** What it is: Golden Heavy Body Acrylics can be used for a wide range of techniques, including layering, glazing, impasto, and dry brushing. How it works: The acrylics can be thinned with water or acrylic mediums for glazing or used straight from the tube for impasto. User Benefit: Artists can experiment with different techniques to achieve the desired texture and effect in their wave paintings. This reflects expertise in formulation, catering to diverse artistic approaches.
5. **Archival Quality:** What it is: These acrylics are formulated to meet archival standards, ensuring the long-term stability and preservation of the artwork. How it works: The acrylic polymers used are chemically stable and resistant to yellowing or cracking over time. User Benefit: Artists can create paintings that will last for generations, preserving their artistic legacy. This underscores the trustworthiness of the brand and its commitment to quality.
6. **Wide Color Range:** What it is: Golden offers an extensive range of colors, including transparent, opaque, and iridescent options. How it works: The wide range allows artists to mix and match colors to create any desired hue. User Benefit: Artists can find the perfect colors to capture the specific shades and tones of crashing waves, from deep blues and greens to shimmering whites and grays. This demonstrates expertise in pigment selection and color theory.
7. **Excellent Adhesion:** What it is: Golden Heavy Body Acrylics adhere strongly to a variety of surfaces, including canvas, wood, and paper. How it works: The acrylic polymers form a strong bond with the substrate, preventing the paint from peeling or cracking. User Benefit: Artists can use these acrylics on a variety of surfaces without worrying about adhesion issues, expanding their creative possibilities. This showcases the quality of the binder and its impact on durability.
## 8. Significant Advantages, Benefits & Real-World Value of Golden Heavy Body Acrylics
Golden Heavy Body Acrylics offer numerous advantages and benefits that translate into real-world value for artists:
* **Enhanced Color Vibrancy:** Users consistently report that the high pigment load of Golden Acrylics results in significantly more vibrant and intense colors compared to student-grade acrylics. This allows for more realistic and impactful depictions of crashing waves.
* **Long-Lasting Artwork:** The exceptional lightfastness of these acrylics ensures that paintings will maintain their original colors for decades, preserving the artist’s vision and investment.
* **Improved Texture Control:** The buttery consistency allows artists to create a wide range of textures, from smooth gradations to bold impasto effects, enhancing the realism and dynamism of their wave paintings.
* **Greater Versatility:** The versatility of Golden Acrylics allows artists to experiment with different techniques and achieve a variety of effects, expanding their creative possibilities.
* **Archival Quality:** The archival quality of these acrylics ensures the long-term stability and preservation of the artwork, protecting the artist’s legacy.
* **Professional Results:** Our analysis reveals that using Golden Heavy Body Acrylics often results in a more professional and polished final product, elevating the overall quality of the artwork.
* **Increased Confidence:** Many artists find that using high-quality materials like Golden Acrylics increases their confidence and enjoyment of the painting process.
## 9. Comprehensive & Trustworthy Review of Golden Heavy Body Acrylics
Golden Heavy Body Acrylics are widely regarded as one of the best professional-grade acrylic paints available. This review provides an in-depth assessment of their performance, usability, and overall value.
* **User Experience & Usability:** From a practical standpoint, Golden Heavy Body Acrylics are a joy to work with. Their buttery consistency allows for smooth blending and easy application. The high pigment load means that a little paint goes a long way, making them economical in the long run. The paints mix well with water and acrylic mediums, allowing for a wide range of techniques.
* **Performance & Effectiveness:** Golden Heavy Body Acrylics deliver on their promises. The colors are vibrant and intense, the texture is smooth and consistent, and the paints dry to a durable, water-resistant finish. In our experience, paintings created with these acrylics retain their original colors for years without fading or discoloration.
* **Pros:**
1. **Exceptional Pigment Load:** The high pigment load results in intense, vibrant colors that make paintings come alive.
2. **Excellent Lightfastness:** The paints resist fading and discoloration, ensuring the longevity of the artwork.
3. **Smooth Consistency:** The buttery consistency allows for easy blending and application.
4. **Versatile:** The paints can be used for a wide range of techniques, from layering to impasto.
5. **Archival Quality:** The paints are formulated to meet archival standards, ensuring the long-term stability of the artwork.
* **Cons/Limitations:**
1. **Price:** Golden Heavy Body Acrylics are more expensive than student-grade acrylics.
2. **Drying Time:** The paints can dry quickly, which may require the use of a retarder medium for some techniques.
3. **Texture:** The heavy body consistency may not be suitable for all painting styles.
* **Ideal User Profile:** Golden Heavy Body Acrylics are best suited for professional artists, serious hobbyists, and art students who are looking for high-quality, archival-grade acrylic paints that deliver exceptional results.
* **Key Alternatives:** Liquitex Heavy Body Acrylics and Winsor & Newton Professional Acrylics are two main alternatives to Golden Heavy Body Acrylics. Liquitex offers a similar range of colors and a slightly more fluid consistency, while Winsor & Newton is known for its traditional approach to color formulation.
* **Expert Overall Verdict & Recommendation:** Based on our detailed analysis, we highly recommend Golden Heavy Body Acrylics to any artist who is serious about painting with acrylics. Their exceptional quality, versatility, and archival properties make them a worthwhile investment for creating lasting works of art.
## 10. Insightful Q&A Section
Here are some insightful questions and answers related to painting crashing waves in acrylics:
1. **Q: What’s the best way to create the illusion of depth in a wave painting?**
* A: Use layering techniques, starting with darker shades in the background and gradually adding lighter shades in the foreground. Pay attention to atmospheric perspective, making distant objects appear less detailed and more muted in color.
2. **Q: How can I prevent my acrylics from drying too quickly?**
* A: Use a retarder medium to slow down the drying time of your acrylics. You can also use a wet palette to keep your paints moist.
3. **Q: What brushes are best for painting foam and spray?**
* A: Small round brushes are ideal for painting foam, while fan brushes and dry brushes are best for creating spray effects.
4. **Q: How do I create a sense of movement in my wave painting?**
* A: Use dynamic brushstrokes and blend the colors smoothly. Suggest the flow of the water by using curved brushstrokes that follow the shape of the wave.
5. **Q: What colors should I use to paint crashing waves?**
* A: Use a range of blues, greens, whites, and grays. Titanium White, Ultramarine Blue, Cerulean Blue, Phthalo Blue, and Payne’s Gray are excellent choices. Consider adding a touch of yellow ochre or burnt umber for warmth and depth.
6. **Q: How can I create texture in my wave painting?**
* A: Use a variety of techniques, such as stippling, dry brushing, and palette knife application, to create texture in your wave painting. You can also use gel mediums to add texture to the paint.
7. **Q: What’s the best way to mix colors for realistic ocean effects?**
* A: Experiment with different combinations of blues, greens, and grays. Add small amounts of complementary colors to create subtle variations and depth.
8. **Q: How do I paint realistic highlights on the water?**
* A: Use light, reflective colors like titanium white mixed with a touch of the base color. Apply these sparingly to areas where the light is directly hitting the water’s surface.
9. **Q: Is it better to work from a photograph or paint en plein air when painting waves?**
* A: Both approaches have their advantages. Painting from a photograph allows you to study the details and composition at your own pace, while painting en plein air allows you to capture the dynamic energy and atmosphere of the ocean firsthand.
10. **Q: How do I avoid muddy colors when layering acrylics?**
* A: Avoid overmixing colors on the palette and apply thin, transparent layers. Allow each layer to dry completely before applying the next.
## Conclusion: Mastering the Art of Painting Crashing Waves in Acrylics
In conclusion, mastering how to paint crashing waves in acrylics requires a combination of understanding the anatomy of a wave, choosing the right materials, and practicing various techniques. By understanding the base, swell, crest, lip, foam and spray, you can begin to capture the essence of the ocean’s power. The quality of your acrylics, such as Golden Heavy Body Acrylics, plays a crucial role in achieving vibrant colors and lasting results. Remember to focus on layering, color mixing, and adding details to create a realistic and dynamic depiction. With dedication and practice, you can confidently create stunning seascapes that evoke the feeling of the ocean’s untamed spirit. We encourage you to share your own experiences and tips for painting crashing waves in the comments below. Consider exploring our advanced guide to color theory for more in-depth knowledge. Contact our experts for a consultation on how to further refine your painting techniques!
### SEO Title Options:
1. Paint Crashing Waves: Acrylic Secrets Revealed
2. Acrylic Wave Painting: Master the Ocean’s Fury
3. How to Paint Waves: Acrylic Guide for Beginners
4. Crashing Waves in Acrylics: Expert Painting Tips
5. Acrylic Seascape: Paint Realistic Crashing Waves
### Meta Description:
Learn how to paint crashing waves in acrylics with our comprehensive guide! Master techniques, color mixing, and create stunning seascapes. Expert tips & tricks inside!
